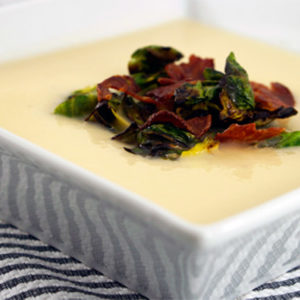
We had an absolutely beautiful week! I need to pinch myself to remember that it’s not even May. The fact that we had amazing weather made my busy stressful workweek much better. I’m also bummed to say that my iritis is flaring again. I was about 2 weeks away from coming off my eye drops and ended up with another flare. I went 3 years from my first case of iritis before I experienced another and now I am onto my third in just 7 months. What the heck is going on? Overall, my AS symptoms have been in check and I have been feeling great so I am a little surprised at why I keep having a re-occurrence. I am taking a hard look at my diet and am going to be making a few tweaks to see what helps. I started with a 3 day water fast. I know water fasting is controversial but I have read so much about water fasting during an autoimmune disease flare. Fasting allows the entire digestive system to rest so that the body can focus on healing itself. There are people out there with many different diseases that swear it helped them, so I figured I would give it a shot. Its only 3 days right? I am happy to say that I am on day three today so tomorrow I will be adding back some simple, easy to digest foods like green juices and smoothies. During my fast I have been diligent about dry body brushing as well as oil pulling to ensure I am ridding myself of any released toxins. I will let you guys know next week if I feel like it made a difference. Getting this far has not been as hard as I thought it would. Now onto the recipe. This one is a version of my favorite pureed cauliflower soup but with the addition of butternut squash. This Butternut Squash Cauliflower Soup can be garnished with simple fresh Italian parsley and a bit of olive oil. Or, for more flavor add a dash of your favorite herb into the blender when you puree. So fast and easy to make and so delicious. If you are a lover of cauliflower soup you may also want to check out a few of my other recipes. Purple Cauliflower Soup With Garlic Sage Olive Oil and Smoked Cauliflower Soup With…
Read MoreBrazil Nut Milk
The weather this weekend has been absolutely beautiful! We have been working outside all weekend long setting up our patio furniture, filling our planters with fresh dirt and uncovering our vintage Preway. So excited for our first meal outdoors. Hopefully that will happen this week because it looks like it is going to be amazing. I feel like we are getting to enjoy a real spring this year. It’s not even May! I have not been eating many nuts lately and have really been missing homemade nut milk in my coffee. The only nuts I had in my cabinet this weekend were raw Brazil nuts. Instead of dashing off to the store I decided to use them to make a batch of Brazil Nut Milk. If you have not tried this type of nut milk before I highly recommend it. It makes a great rotation into your typical almond and cashew nut milk. It’s delicious plain and even yummier with a little bit of raw cacao mixed in. This recipe uses my same budget saving tip as my almond and cashew milk. Enjoy! Print Brazil Nut Milk Author: Katie at WHOLELOVELYLIFE.COM Recipe type: Smoothies + Drinks + Juices Prep time: 8 hours Cook time: 10 mins Total time: 8 hours 10 mins Serves: 8 cups 21 Day Sugar Detox (omit sweetener), Whole 30 (omit sweetener), Paleo, Pescatarian, Vegan, Vegetarian, Dairy Free, Gluten Free, Grain Free, Refined Sugar Free Ingredients 1 Cup Brazil nuts 8 Cups Filtered Water ¼ Tsp Celtic Salt/ Sea Salt Sweetener and Flavor Options: 3 dried dates or Figs 1 Vanilla Bean or 1 Tsp Vanilla Extract 1 Tbsp Organic Grade B Maple Syrup or Organic Honey Instructions Add Brazil nuts to a jar or bowl and fully cover with water. Add salt and soak for at least 8 and as long a 24 hours. You can place them in the fridge or leave them on your counter. I find they plump up better outside the fridge but don’t soak any longer than 24 hours outside the fridge. Rinse soaked Brazil nuts and add to blender or food processor with 4 cups of filtered water. Blend for 2 min or until Brazil nuts are fully blended with water. In a large bowl pour blender contents into a nut bag and squeeze until all the milk passes through. Add the pulp back to the blender with an additional 4 cups…
Read MoreSweet + Savory Kale With Maple Almonds
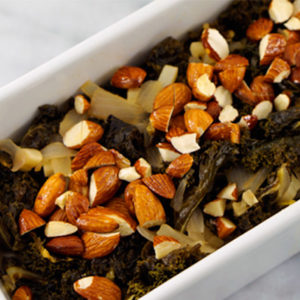
I can’t even explain how excited I am that winter is finally winding down and spring is officially here… at least I think its here. I’m sorry for my lack of posts lately. I have been really trying to detach at night when I get home from work and spend as much time with my little guy as I can. Sometimes I can’t believe how big he is and how fast this now 2 years, 3 months have gone. I also recently saw a new homeopathic Chinese medicine doctor and healer so have been focusing on continuing to heal my autoimmune disease. In addition I am proud to say I have gotten up at 4am for 3 weeks straight to get my workouts in! It feels so great to finally be getting my groove back. For all you working Mom’s out there I would love to hear how you fit your workouts in. I feel like if I don’t get them in first thing in the morning it just doesn’t happen. I have been warming up with about 15 minutes of rebounding and then following the PiYo program. I plan on writing a review of PiYo once I complete it. So far I am really loving it but taking it a bit slower and repeating some of the videos until I feel ready to move to the next level. I have really been more tuned into my body and what it needs lately. I think that is one of the best things you can do regardless of if you have a chronic illness or not. If you listen, your body will tell you what it needs! Now onto the recipe! Kale is by far one of my favorite veggies. I have loved it even before they were selling kale t-shirts and farmers market totes. If you have not noticed kale has pretty much become a trend right along side brussel sprouts. I think what makes kale so incredibly versatile is that you can prepare it in a number of ways raw as well as cooked. The leaves are great thrown into smoothies, as a salad (massage with a bit of olive oil to soften) or as crunchy kale chips. If you use just the leaves be sure to reserve the stems for juicing. I am also a fan of roasting it in the oven or in this case sauteing it…
Read MoreSmoked Cauliflower Soup With Brussel Sprouts + Bacon
Winter may be winding down but I am still enjoying hearty soups and this Smoked Cauliflower Soup With Brussel Sprouts + Bacon might be my favorite of all time. I recently served it when my husband’s parents were visiting and it received rave reviews. If you like cauliflower, brussel sprouts and bacon you are going to love this soup. With a substantial garnish you can take a simple soup and turn it into a main course. I am a huge fan of roasting brussel sprouts halved or quartered in the oven. But, for this this recipe I took each little spout and peeled the leaves off one by one and then cooked them in a cast iron skillet. I know it sounds time intensive and it is but I promise the end result is so worth the work. Because I used the brussel spouts as garnish I wanted to make sure they were light and crispy so they didn’t sink to the bottom of the bowl. By cooking them in a cast iron skillet you can control how brown they become, whereas the oven tends to dry out the leaves or burn them. Top the brussel spouts with a little bacon and this soup is good to go! This soup can easily be made autoimmune protocol, vegan or vegetarian. Instructions below. Enjoy! Print Smoked Cauliflower Soup With Brussel Sprouts Author: Katie at WHOLELOVELYLIFE.COM Recipe type: Soups + Salads, Entree Prep time: 20 mins Cook time: 45 mins Total time: 1 hour 5 mins Serves: 4 servings Autoimmune Protocol, Paleo, Whole 30, Grain Free, Gluten Free, Dairy Free, Refined Sugar Free, 21 Day Sugar Detox, Vegan (special instructions), Vegetarian (special instructions) Ingredients 1 yellow onion 1 large head of cauliflower 4 cloves of garlic 4 Tbsp olive oil 6 cups of filtered water (use less water if using a small head of cauliflower, water should just cover cauliflower) 1 bag fresh brussel sprouts 1 tsp + ⅛ tsp smoked sea salt 4 pieces of bacon (omit to make vegetarian + vegan) 1 Tbsp ghee (omit to make autoimmune protocol + vegan) Instructions Peel and onion and garlic and chop. Add onion and garlic to a pot with 2 Tbsp olive oil. Sautee about 10 min or until the onion is translucent. Chop cauliflower and add to pot along with 6 cups of water (adjust as needed based on size of cauliflower head). Boil…
Read MoreAcupuncture + Autoimmune Disease (Post 1)
If any of you are contemplating the use of Acupuncture to either help manage a disease (autoimmune or other) or just considering it to help with day to day stress I’m hoping this blog series might help you to decide if acupuncture is right for you. I went to acupuncture awhile back for a number of years. This was prior to my Ankylosing Spondylitis diagnosis so I guess in a sense my acupuncturist was sort of shooting in the dark since she really did not know what was causing my pain. She was an awesome practitioner and truly listened to my entire medical history. Even though we were shooting in the dark the greatest benefits I saw at the time were better sleep, less stress, management of my neck, back and hip pain as well as improved digestion. I would leave each appointment feeling so relaxed and pain free that I would have thought I had a 90 min deep tissue massage. Back then the majority of my pain was in my cervical spine. After dealing with a chronic stiff neck in what felt like forever, feeling pain free for even a few hours was a huge relief. At the same time I was going to acupuncture on a weekly basis I learned about Active Release Technique which is a type of deep tissue massage that involves movement and relieves tension by removing fibrosis adhesion that develop in your muscles and tissue over time due to repetitive use. I decided to give it a try and really liked it. I felt it was increasing my range of motion and helping with pain but found it hard to shell out $200 a week for both treatments. This is when I quit acupuncture and probably made one of the is biggest mistakes I have made since I started my healing journey. I think acupuncture offers so many total body benefits that it truly is one of the easiest and most beneficial practices you can take up. It has been at least 3 years since I revisited it and instead of beating myself up about how I quit in the past I am excited to be back at it. On Monday, Jan 26th I had my first appointment. I’m excited to take you on this journey with me and share my experience as it relates to treatment for my autoimmune disease and the other…
Read MoreLamb Burger With Cucumber + Lemon Tahini Sauce
If you are a burger lover and have not tried lamb burgers then you are totally missing out. This Lamb Burger With Cucumber + Lemon Tahini Sauce would be a great place to start. Even though I am not a huge meat eater I do enjoy lamb once in a while and I think it’s one of the most overlooked healthy proteins. Lamb is high in iron and zinc and the zinc found in lamb meat is more easily absorbed into the body than zinc from any other source. Lamb also provides a good dose of B vitamins, copper, selenium and manganese. If you can find grass fed lamb in your area you will also get a healthy dose of Omega-3. The days are finally getting longer which means it is light after work and we can actually enjoy grilling again. I love grilling in the winter because it’s an easy, quick way to prepare dinner and reminds me that summer is just around the corner. If you are following strict Autoimmune Protocol be sure to omit the smoked paprika and lemon tahini sauce. This burger is also delicious with a bit of lemon juice or dijon mustard instead. Enjoy! Print Lamb Burger with Cucumber + Lemon Tahini Sauce Author: Katie at WHOLELOVELYLIFE.COM Recipe type: Entrees Prep time: 30 mins Cook time: 20 mins Total time: 50 mins Serves: 4 burgers Paleo, Grain Free, Gluten Free, Dairy Free, Autoimmune Protocol (omit smoked paprika + Lemon Tahini Sauce), Refined Sugar Free Ingredients 1 lb ground lamb 1 small red onion 3 Tbsp chopped mint 8 boston butter lettuce leaves 8 slices of cucumber 1 tsp + ¼ tsp sea salt 1 tsp smoke paprika (omit to make AIP compliant) 2 tsp garlic powder 1 cup tahini (omit to make AIP compliant) up to ¾ cup filtered water (add a little at a time until desired consistency is reached) up to 3 cloves garlic (depending on how much you like garlic) ¼ cup fresh squeezed lemon juice ¼ cup + 2 tsp chopped flat leaf parsley Instructions Wash mint, chop and set aside. Remove lettuce leaves and wash. Set aside. Wash cucumber, slice thinly into long strips and set aside. Wash parsley, chop and set aside. Peel and chop ½ of the red onion. Slice the other half thinly and set aside. To make burgers combine ground lamb, sea salt, garlic powder, paprika, chopped onion and ¼ cup…
Read MoreLime Cream Pie Smoothie
If you are as tired of winter as I am then you are going to love this Lime Cream Pie Smoothie. It is a refreshing, summer inspired smoothie with the perfect balance of sweet and tart. The minute you taste it you will be reminded of long summer days and a walk on the beach. I know that sounds a bit cheesy but for me every time I taste lime I think of sunshine, the beach and vacation. Who doesn’t need that during the winter? Especially if you live in a northern state. The best part about this smoothie is it only takes a few minutes to whip up and it’s filled with a good dose of healthy fats and nutrients. Enjoy! Print Lime Cream Pie Smoothie Author: Katie @ WHOLELOVELYLIFE.COM Recipe type: Smoothies + Drinks + Juices Prep time: 5 mins Total time: 5 mins Serves: 2 servings Autoimmune Protocol, Paleo, Vegan, Vegetarian, Refined Sugar Free, Dairy Free, Gluten Free, Grain Free, Pescatarian Ingredients juice from 2 limes 2 lime slices (slice before juicing) 1 avocado ½ cup full fat coconut milk 1 banana 4 dates ¼ cup ice Optional: up to ½ cup filtered water as needed to blend smoothly Optional: zest from one lime if you prefer a stronger lime flavor Instructions Slice lime in half. Slice again and cut slice in half. Set aside for garnish. Juice limes halves and pour into a blender. Add avocado (cut in half, remove pit and scoop out), coconut milk, banana, dates (be sure to remove pit), optional lime zest and ice. Blend on high until well mixed adding additional water as needed. Garnish with a lime slice and cute straw. Notes Use organic whenever possible! It’s always best to use coconut milk free of guar gum but it is critical if following Autoimmune Protocol. 3.2.2929
Read MoreSweet + Tangy Pork Lettuce Wraps
I love Asian inspired dishes and lettuce wraps have always been one of my favorites. The autoimmune protocol can make it a bit tricky to create an amazing sauce but I think you guys are really going to love this one. It’s sweet and tangy and all-around perfect! Don’t let the number of ingredients scare you. I promise this is an easy, fast recipe that can be thrown together on a busy weeknight. I used pork but you can easily substitute chicken or turkey or even veggies if you want to keep it vegan. Enjoy! Print Sweet + Tangy Pork Lettuce Wraps Author: Katie at WHOLELOVELYLIFE.COM Recipe type: Entree Prep time: 15 mins Cook time: 20 mins Total time: 35 mins Serves: 8 wraps Autoimmune Protocol, Paleo, Gluten Free, Grain Free, Dairy Free Ingredients 1 small head of iceberg lettuce 1 small carrot ¼ small head of red cabbage 1 mango ¼ cup mint ¼ cup cilantro ½ medium size red onion 1 lb ground pork 1 inch piece of ginger 1 garlic clove 2 Tbsp red wine vinegar 3 Tbsp raw honey 4 Tbsp coconut aminos ⅛ tsp sea salt 2 Tbsp olive oil 1 Tbsp orange juice Instructions Wash iceberg lettuce and cut into quarters. Peel leaves off to create wraps. Set aside. Wash mango and cut into cubes. Peel and chop red onion. Set aside. Peel and julienne or thinly slice carrot and set aside. Wash and chop mint and set aside. Wash and chop cilantro and set aside. Peel and finely chop ginger and garlic clove and set aside. In a separate bowl add honey and warm just until it becomes a liquid. Add vinegar, coconut aminos, sea salt, ginger, garlic and orange juice. Mix well to combine. Set sauce aside. In a skillet add olive oil and meat. Break up meat and stir continually until it is half cooked. This should take about 5-10 min. Add onions and cook an additional 5 min. Stir every minute or so. Add sauce, mix well and cook another 5-10 min or until meat is browned and sauce starts to thicken. Stir every few minutes. To serve place a spoonful of pork on top of a lettuce leaf and top with cabbage, carrot, cilantro, mint and mango. Notes Use organic conscientiously raised meat whenever possible! 3.3.3077
Read MoreRoasted Kale With Pepitas, Garlic + Lemon
You are going to love this super simple roasted kale recipe that makes a perfect main or side dish. Number one it only takes minutes to throw together and number two it cooks in just 15 min so you will have yummy kale in your tummy before you know it. I have been a kale lover well before it became the trendy thing to do. I mean what is there not to love! Kale is one of the worlds most nutrient dense foods due to its high nutrient load and the fact that it’s super low in calories (1 cup contains only 33). The vitamins you will find in kale include A, K, C, B6, Manganese, Calcium, Copper, Potassium and Magnesium. It even gives you a dose of the omega-3 fatty acid alpha linolenic acid. I love getting my vitamins through food vs. supplements and eating kale a few times a week is a great way to do that. If you eat a large amount of greens weekly its a good idea to add one raw Brazil nut to your diet daily which supports normal iodine levels an may in turn support a healthy thyroid. Enjoy! Print Roasted Kale With Pepitas, Garlic + Lemon Author: Katie at WHOLELOVELYLIFE.COM Recipe type: Sides + Salads Prep time: 5 mins Cook time: 15 mins Total time: 20 mins Paleo, Autoimmune Protocol (omit the pepitas), Whole 30, 21 Day Sugar Detox, Vegan, Vegetarian, Pescatarian, Gluten Free, Grain Free, Dairy Free Ingredients 1 bunch kale ½ lemon 5 cloves garlic sprinkle of garlic powder (optional) 3 Tbsp olive oil ¼ tsp sea salt ¼ cup pepitas Instructions Wash kale and remove leaves from stems. Chop garlic. Wash and cut lemon in half. On a baking sheet lay kale out and sprinkle with garlic and pepitas. Pour olive oil over kale. Sprinkle with garlic powder (if you prefer a stronger garlic flavor) and sea salt. Bake at 435 degrees for 15 min. Toss a few times to evenly cook. Remove from oven, plate and squeeze lemon juice on top. Notes To make Autoimmune compliant omit the pepitas. Use organic whenever possible! 3.2.2885
Read MoreDairy Free Strawberry Milkshake
Valentines Day is just around the corner! If you are the celebrating type and looking for an easy and fun dessert to share with your big love or little loves then this one is perfect. It’s made with simple ingredients but I call it a milkshake instead of a smoothie because it’s definitely a treat. This no milk, milkshake has coconut milk, strawberries, maple syrup and vanilla bean. The vanilla bean gives it an ice cream flavor but can easily be omitted if you are strict autoimmune protocol. Serve with a chocolate strawberry on the side (sadly not AIP) to make it a super special occasion. Enjoy! Print Dairy Free Strawberry Milkshake Author: Katie at WHOLELOVELYLIFE.COM Recipe type: Treats + Snacks Prep time: 15 mins Total time: 15 mins Serves: 2-4 servings Paleo, Vegan, Dairy Free, Grain Free, Gluten Free, Vegetarian, Pescatarian, AIP (see note) Ingredients 1 can coconut milk (cream only) 3 cups of frozen strawberries 2 vanilla beans scraped (can omit or use vanilla extract) 2 Tbsp grade B maple syrup (can omit or sweeten to taste) 1 cup of filtered water 1 pint fresh strawberries ¼ cup organic fair trade chocolate chips (I like Sunspire which have sugar but I do consume on occasion) Instructions Place chocolate in a double boiler over low heat until melted. Scrape 1 vanilla bean and add to chocolate. Stir well. Dip all fresh strawberries in chocolate and place on a parchment lined pan. Allow to set before moving. To make milkshake refrigerate the can of coconut milk over night and when you remove it from the fridge flip the can upside down and open from the bottom. Scoop out just the cream and put in a blender. Add strawberries, maple syrup and water. Scrape the second vanilla bean and add to blender. Blend on high for 2 min or until well mixed and creamy. Notes To make milkshake AIP compliant omit the vanilla bean and add 1 Tbsp less maple syrup. Chocolate strawberries are NOT AIP!Use organic whenever possible! 3.2.2885
Read More