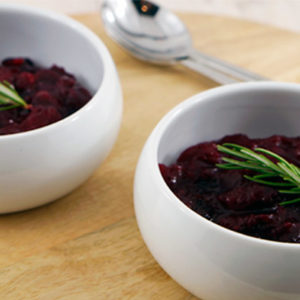
Oh my gosh! Can you believe that we are almost a week away from Thanksgiving? I don’t know about you but I am having trouble figuring out where November went. Don’t get me wrong I’m excited about a day off work and time with friends and family but what the heck. I had so planned on doing this amazing blog post on my anticipated Thanksgiving spread and it’s so not happening the way I planned. I promise to get a few more posts up before next Thursday but I guess if I don’t they will still taste good even even if Thanksgiving is over right? I have been spending my time wisely getting back into my running routine and its feeling great! Here is a super simple recipe not only for Thanksgiving but anytime you want a delish side. Cranberries are ridiculously high in antioxidants so I hope you love them as much as I do. Happy almost a week before Thanksgiving planning! Enjoy! Print Refined Sugar Free Cranberry Sauce Author: Katie at WHOLELOVELYLIFE.COM Recipe type: Confiments + Sauces Prep time: 5 mins Cook time: 20 mins Total time: 25 mins Serves: 4 servings Autoimmune Protocol, Paleo, Vegan, Vegetarian, Refined Sugar Free, Gluten Free, Grain Free Ingredients 1 bag fresh cranberries 1 cup orange juice zest from 1 whole orange ½ cup clover honey or maple syrup Instructions Put cranberries, orange juice, orange zest and sweetener in a pot on the stove top and bring to a boil. Once the mixture boils turn the heat down to simmer for 20 min or until cranberries burst and are well mixed. Notes Use organic whenever possible! 3.2.2885
Read MoreRosemary Thyme Chicken
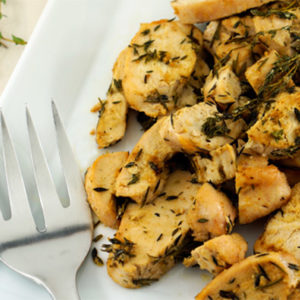
Now that we have a good amount of snow on the ground I am totally getting into the holiday spirit. Probably a bit earlier than most given our Christmas tree is already up in our living room. Yes, you heard me right! I figure why not enjoy it for as long as we can. My little guy can’t stop talking about it and pointing at all the ornaments he loves. But, before we get to Christmas we need to get to Thanksgiving first so I thought I would start sharing some simple and delish recipes to get you thinking about your menu. It totally depends on how large a gathering you will be hosting but I tend to never make a full blown turkey. They are just too big for the smaller size gatherings I have hosted in the past. Most years I have made a few turkey breasts and when I went to Whole Foods this past weekend looking for some sadly they were totally out. I guess I’m not the only one doing some early Thanksgiving experimenting. I ended up with some really nice organic chicken breasts and realized that if you are not into the whole turkey thing you can substitute chicken and still have a traditional feeling meal but without all the hassle and left overs. This chicken is also super tasty cold so if you are into making the post Thanksgiving sandwich you still can! Hope everyone is having a fabulous fall! Enjoy! Print Rosemary Thyme Chicken Author: Katie @ WHOLELOVELYLIFE.com Prep time: 5 mins Cook time: 45 mins Total time: 50 mins Serves: 4 servings Autoimmune Protocol, Whole 30, 21 Day Sugar Detox, Paleo, Grain Free, Gluten Free, Dairy Free Ingredients 4 chicken breasts ½ container of fresh rosemary and thyme 2 Tbsp ghee 1 Tbsp garlic powder 1 tsp sea salt Instructions Melt ghee. Lay half the rosemary and thyme on the bottom of a baking dish and pour half of the melted ghee over. Lay chicken breasts down on top of herbs and ghee. Place the other half of the rosemary and thyme over the top of the chicken. Pour the remaining melted ghee over the top. Sprinkle with garlic powder and sea salt. Cook for 45 min or until internal temp of chicken reaches 165 degrees. Flip the chicken half way though for even browning. Once chicken is cooked slice and pull…
Read MoreSpinach Artichoke Pizza With Cauliflower Cream
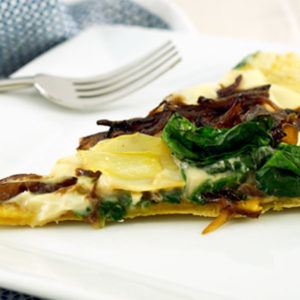
I know I say it a lot but I really am excited to share this new recipe with all of you. Its Pizza! Not only is it pizza but it has a sauce that is free of nightshade vegetables making it autoimmune protocol compliant as well as paleo and vegan! Are you loving it? I thought you would! The creamy white sauce is made from cauliflower but you would never know it. It’s creamy and flavorful and is so easy to make. It’s a thicker version of my favorite cauliflower soup but iincorporates garlic oil which gives it amazing flavor. This is the best sauce I have made yet for AIP compliant pizza. This recipe makes a bit more sauce than needed but any extra can be served on the side for dipping. Don’t be intimidated by the long list of ingredients and instructions. I promise this pizza is super easy to make. I have also found the crust and sauce freezes well so you can always make an extra batch of both to have ready for a quick lunch or dinner. When it comes to toppings feel free to get creative. This pizza was inspired from spinach artichoke dip but the possibilities are endless. The cauliflower cream sauce goes great with just about anything. Enjoy! Print Spinach Artichoke Pizza With Cauliflower Cream Author: Katie at WHOLELOVELYLIFE.com Recipe type: Entree Prep time: 30 mins Cook time: 40 mins Total time: 1 hour 10 mins Serves: 8 slices Autoimmune Protocol, Paleo, Vegan (leave out gelatin egg), 21 Day Sugar Detox, Whole 30, Vegetarian, Gluten Free, Grain Free, Dairy Free Ingredients 2 cups tapioca or arrowroot flour ¾ cup full fat coconut milk 5 Tbsp olive or avocado oil 1½ tsp sea salt 1 gelatin egg 4 Tbsp nutritional yeast 1 medium size red onion ½ can of artichoke hearts 2 handfuls of fresh spinach 4 cups fresh or frozen cauliflower 8 cloves garlic 4-6 cups filtered water Instructions Slice red onion and set aside. To make sauce start by chopping garlic and setting aside. If using fresh cauliflower chop into even sized florets. Personally I love using frozen. It saves a ton of time! Heat 4 Tbsp olive or avocado oil for about 30 seconds and add chopped garlic. Cook until it sizzles then turn off flame and remove from heat. Let the garlic oil sit while the cauliflower cooks. In a large pot add…
Read MoreCoffee Free Pumpkin Spice Latte
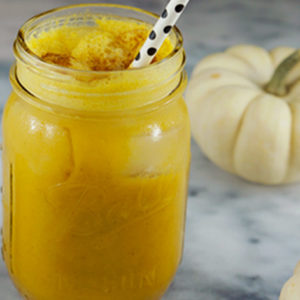
If you follow my Instagram you know I treat myself to a Starbucks Pumpkin Spice Latte once a year on Halloween, but make a few changes to it so that it’s as “healthy” as a Starbucks pumpkin spice latte can be. I get 3 shots of espresso and add 1 shot of pumpkin spice plus my own coconut or nut milk from home. It tastes just as good but eliminates a lot of the junk. Even with this method I feel like I can only have it as a once a year treat. Who can only have a pumpkin spice latte once a year? Not me! When it’s not Halloween I whip up my own Autoimmune Protocol compliant version. This Coffee Free Pumpkin Spice Latte is super easy to make and is so much healthier since it uses real pumpkin and added anti-inflammatory spices turmeric and ginger. If you are looking for a budget friendly nut milk check out my Almond Milk and Cashew Milk recipe. Enjoy! Print No Coffee Pumpkin Spice Latte Author: Katie at WHOLELOVELYLIFE.COM Recipe type: Smoothies + Drinks + Juices Prep time: 5 mins Total time: 5 mins Serves: 1 serving Autoimmune Protocol, Paleo, Vegan, Dairy Free, Gluten Free, Grain Free Ingredients 2 cups homemade coconut or nut milk of choice (canned coconut milk is too thick for this, if using store bought coconut or nut milk be sure its free of carrageenan) 1 cup pumpkin 1-2 Tbsp grade B maple syrup depending on desired sweetness ⅛ tsp clove 1¼ tsp + a sprinkle cinnamon ½ tsp ginger ¼ tsp turmeric ½ cup ice Instructions Place all ingredients except the ice in a blender. Blend on high for 30 seconds to 1 min. Pour over ice and sprinkle with cinnamon. 3.2.2802
Read MoreRestaurant Style Baked Sweet Potato Fries
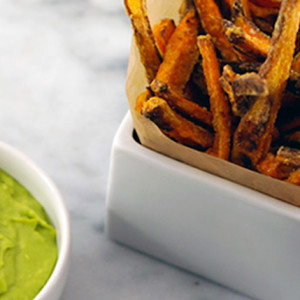
I’m so excited to share this recipe with all of you because I think you are really going to love it! I have discovered a way to get perfectly crisp sweet potato fries just like you get in a restaurant. They are gluten free, paleo and autoimmune protocol compliant! Burger night will never be the same! This method works for any and all veggies so the possibilities for crispy fries are endless. If you have tried my cooking method for salmon then you know a nice coating of arrowroot or tapioca flour makes all the difference in achieving a nice golden crisp coating. When I was making salmon the other day the idea of tossing veggie fries with arrowroot or tapioca flour popped into my head. I gave it a shot and the outcome was the best sweet potato fries I have ever had. The only thing that would make these fries better is some ketchup of course. As you know tomatoes are a no-no on the autoimmune protocol so if you are looking for something to fill the void I recommend you try my Beet + Carrot Ketchup. Or, if you are looking for something a little fancier an egg-less avocado aioli is perfect. The recipe is included below. Enjoy! Print Restaurant Style Baked Sweet Potato Fries Author: Katie at WHOLELOVELYLIFE.COM Recipe type: Salads + Sides Prep time: 10 mins Cook time: 20 mins Total time: 30 mins Serves: 2-4 servings Autoimmune Protocol, Paleo, Whole 30, Gluten Free, Grain Free, Vegan, Vegetarian Ingredients 2 medium sized sweet potatoes or and root vegetable 2 Tbsp avocado or melted coconut oil ¼ cup arrowroot or tapioca flour 1 medium sized avocado 1 Tbsp fresh squeezed lemon juice 1 tsp + ¼ tsp sea salt 1 Tbsp + 1 tsp garlic powder 1 Tbsp olive oil Optional: you can change any seasoning out for the garlic powder or omit completely Instructions Wash and slice sweet potato into even sized pieces. Place cut sweet potato in bowl and toss with avocado or melted coconut oil and toss well. Add arrowroot or tapioca flour along with 1 tsp sea salt, 1 Tbsp garlic powder and toss well to ensure all potato slices are coated. Lay potato slices out on a pan so they are not overlapping too much. I like to use two pans and then rotate half way through cooking. Bake in the oven at 425 for 15-20 min checking often…
Read MorePaleo Cheesy Broccoli Soup
Even though I am technically a meat eater now I really only have meat 1 to 2 times per week. I always have, and still do prefer a veggie, vegan or pescatarian meal. Not only am I a fan of how easy veggie meals are to throw together but also I love a good soup because I always have left overs, which means I also have lunch for a few days. Prepping lunches is one of my least favorite things to do so anytime I have left overs I am a happy camper. I love this Paleo Cheesy Broccoli Soup! It’s filled with tons of nutrients and is oh so good. It’s “Cheesy” flavor and consistency come from nutritional yeast. If you have not tried nutritional yeast you are missing out. I have been using it for many years and I feel like I keep finding more and more things to add it to. Not only does it add a ton of flavor but its high in fiber, protein, folic acid and vitamin B-12. What’s not to like! A sprinkling of dried turmeric gives this soup an extra boost of color and anti-inflammatory benefits. Enjoy! Print “Cheesy” Broccoli Soup Author: Katie at WHOLELOVELYLIFE.COM Recipe type: Entree Prep time: 5 mins Cook time: 35 mins Total time: 40 mins Serves: 6 cups Vegan, Paleo, Autoimmune Protocol, Vegetarian, Whole 30, 21 Day Sugar Detox Ingredients 5 cups of broccoli fresh or frozen 1 medium onion 4 Tbsp olive oil 4 cloves garlic 3 cups vegetable broth 2 cups coconut milk full fat 1 cup nutritional yeast 1 tsp sea salt 1 Tbsp fresh squeezed lemon juice 1 Tbsp Dijon mustard Optional: sprinkling of dried turmeric for garnish Instructions Chop onion and garlic. Add onion and garlic to a large pot with 1 Tbsp olive oil. Saute until onion is almost translucent and garlic is just starting to brown. Add vegetable broth, coconut milk, broccoli, 3 Tbsp olive oil and Dijon mustard. Bring to a simmer, cover and cook for 20 – 30 min or until broccoli is starting to fall apart. Remove from heat and add nutritional yeast, lemon juice and up to 1 tsp sea salt to taste. Add half the soup to a blender and blend to desired consistency. Dump into a bowl and add the other half. Blend again and combine with the 1st blended batch. Stir to fully mix, sprinkle…
Read MoreCaramelized Onion, Green Olive + Bacon Pizza
Pizza has always been one of my favorite foods but you need to get creative to make a pizza that not only tastes good but also is Autoimmune Protocol compliant. Tackling the crust has to come first. I have made many different Paleo pizza crusts but not being able to use eggs makes the task a bit more difficult. After doing some research on replacements for eggs I found that you can actually make one out of gelatin! I was super excited to hear this because I have been trying really hard to eat more grass fed gelatin. I have been trying this egg replacement in everything lately and let me tell you it has changed my life! Sorry for the excitement but giving up eggs has been rough. I’m loving the simplicity of this crust and how crunchy and airy it gets. I definitely feel like I am having pizza when I make it. The best part is you can top this crust with anything so it’s easily modifiable for Vegans (just leave out the gelatin egg) or other dietary requirements. Enjoy! Print Caramelized Onion, Green Olive + Bacon Pizza Author: Katie at WHOLELOVELYLIFE.com Recipe type: Entree Prep time: 30 mins Cook time: 12 mins Total time: 42 mins AIP, Gluten Free, Grain Free, Paleo, Whole 30, 21 DSD, Vegan (leave out gelatin egg and modify toppings) Ingredients 2 cups tapioca or arrowroot flour ¾ cup full fat coconut milk 2 Tbsp olive or avocado oil + 1 Tbsp for caramelizing onions ½ tsp sea salt 1 gelatin egg 4 Tbsp nutritional yeast 1 medium size red onion ¾ cup green olives 4 pieces bacon (make sure its sugar free if using during Whole 30 or 21 DSD) Instructions Slice red onion and set aside. Cook bacon and set aside. Slice green olives and set aside. To make the crust heat coconut milk and 2 Tbsp oil for about 3 min on medium high stirring constantly. The heated coconut milk and oil will mix easier with the tapioca or arrowroot flour. In a bowl mix tapioca/arrowroot flour, coconut milk oil mixture, sea salt, gelatin egg (see instructions below) and nutritional yeast with a hand mixer or by hand with a spoon until a dough ball is formed. I personally like to do it by hand. Spread a piece of parchment paper on your counter and place the dough ball in the…
Read MoreWatermelon Mint Mocktail
My parents are in town and I’m having a great time. It’s not as hard as you think to stick to a modified diet or what I like to call the norm when you have out of town guests, but it can be hard to watch everyone enjoying their morning coffee or an alcoholic beverage from time to time. Instead of sipping on tea and water only, try a mocktail! Using fresh juices and herbs solo or with sparkling water makes for a tasty alternative. If you are following the Autoimmune Protocol just make sure to watch how much juice you drink. If I’m going to enjoy juice in the evening I typically stay away from fruit during the day. Muddling mint with just about anything is amazing but with fresh watermelon juice you can’t go wrong. If you are in the mood to add a little something to your drink try a little gluten free vodka like Ciroc. Now I know vodka is not exactly Paleo but I think once in awhile its fine as long as you are not on the Autoimmune Protocol. Enjoy! Print Watermelon Mint Mocktail Author: Katie @ WHOLELOVELYLIFE.COM Recipe type: Smoothies + Drinks + Smoothies Prep time: 5 mins Total time: 5 mins Serves: 1 AIP, Paleo, Refined Sugar Free, Diary Free, Vegan, Gluten Free Ingredients 8 oz watermelon juice 10 mint leaves Optional: 4 oz sparkling water Optional: 1 shot gluten free vodka Mint stalk with leaves for garnish. Instructions Juice watermelon. Wash and remove mint leaves from stalk. Place mint leaves in glass and muddle. Add watermelon juice to a shaker with ice. If adding optional vodka add to shaker. Shake until cold and pour over muddled mint and stir. Top with optional sparkling water and mint stalk for garnish. 3.2.2802
Read MoreRaspberry Lemon Mousse
How did this week fly by so fast! I just can’t seem to keep up these days. It’s crazy to think the holidays are just around the corner and that I need to get moving on my babes Halloween costume stat! I hope everyone is enjoying the change of seasons wherever you happen to be. Seeing the leaves change and breathing in the cool, clean, crisp air is one of my favorite parts of fall. I have a love-hate relationship with fall because I know it means winter is just around the corner. Normally I am dreading the colder weather but this year I am so excited about all the fun things to come having a 20-month-old in my life. I love seeing my little guy with wide eyes when he experiences things for the first time and it’s like reliving those moments myself due to all the memories that come rushing back. But, before we say goodbye to summer and take a trip to the pumpkin patch I need to get in a few more summer recipes. This Raspberry Lemon Mousse certainly feels a bit more summer than fall but it is delicious all the same. And, you can take this basic coconut milk mousse base and make your own creations. The flavor combos are endless. This recipe is perfect as a simple and easy dessert and makes a great breakfast too! I have a few fall mousse recipes coming soon! Start experimenting now if you can’t wait. Enjoy! Print Raspberry Lemon Mousse Author: Katie at WHOLELOVELYLIFE.COM Recipe type: Treats + Snacks Prep time: 5 mins Total time: 5 mins Serves: 6 servings Autoimmune Protocol, Paleo, Dairy Free, Grain Free, Gluten Free, Refined Sugar Free Ingredients 2 cans full fat room temp coconut milk 3 cups fresh or frozen and defrosted raspberries Juice from 2 lemons 2 Tbsp grass fed gelatin (more if you like a firmer mousse) Optional: 2 Tbsp grade B maple syrup Instructions If using frozen raspberries defrost until soft. Juice 2 lemons and set aside. In a blender add coconut milk, raspberries, lemon juice, gelatin, and optional maple syrup. Blend on high until fully mixed and bit airy. Pour in glasses or bowls. Set in the fridge for 2-3 hours or overnight. 3.5.3208
Read MoreRaw Cacao Almond Butter Cups
Peanut butter cups are my hubbies favorite and because I love him so much I whipped up a batch of these tasty Raw Cacao Almond Butter Cups. Now I know these aren’t exactly the same but they have a good balance of sweet, salty and chocolate like the real thing with the bonus of being so much healthier. They are great to keep in the freezer for a quick treat and I promise your peanut butter cup obsessed husbands will love them too! If you are following the 21 Day Sugar Detox these are completely compliant just be sure to leave out the optional sweetener. Enjoy! 5.0 from 1 reviews Print Raw Cacao Almond Butter Cups Author: Katie at WHOLELOVELYLIFE.com Recipe type: Treats + Snacks Prep time: 5 mins Cook time: 20 mins Total time: 25 mins Serves: 11 cups 21 Day Sugar Detox, Paleo, Gluten Free, Grain Free, Vegan, Dairy Free Ingredients 6 Tbsp raw cacao powder ¾ cup coconut oil ½ tsp vanilla extract 3 Tbsp raw almond butter ⅛ tsp sea salt Optional: 8 drops of liquid stevia or 1 tsp honey/maple syrup Instructions Measure out almond butter and mix with sea salt and optional sweetener (no stevia or sweetener if following the 21 DSD). Place in the freezer while you prep the chocolate. Slightly hardened almond butter works better than room temperature because it stays in place to ensure it does not leak out the sides. In a pot or microwave melt coconut oil. Mix in raw cacao powder and vanilla extract (I like to mix everything in a large pourable measuring cup). Pour half the mixture evenly into a silicone mold or parchment lined cupcake pan. Place in freeze to set for about 5 min. Place even scoops of almond butter in the center of each cup. Place in the freezer to set about 5 min. Tip: To keep chocolate mixture melted while the cups set I like to rest the measuring cup in a bowl of hot water. Pour the remaining chocolate mixture over the cups and ensure all almond butter is covered. Place in the freezer to set for about 10 min. Cups can be kept in either the freezer or fridge for a few weeks. Notes Use organic whenever possible! 3.2.2929
Read More