Did you know you can make your own coconut butter? Its something I have wanted to try for a long time and finally took the plunge. Lets just say I will not be going back to buying it from the store. Its much more budget friendly and tastes just as great. For those of you new to coconut butter let me fill you in. It’s different than coconut oil; a lot of people just don’t realize it. What makes it different is that it includes the coconut meat as well as the oil where coconut oil is just the oil. Coconut butter also packs more of a nutritional punch. It has 2 grams of fiber per 1 Tbsp. as well as potassium, magnesium and iron. You need to be patient when you are making coconut butter. It will take some time for the dried coconut to heat up and start turning into butter so don’t worry you are not doing anything wrong. You can add a small amount of coconut oil as needed to help the process go a bit smoother. Enjoy! Print Coconut Butter Author: Katie at WHOLELOVELYLIFE.com Recipe type: Snacks + Treats Prep time: 5 mins Cook time: 30 mins Total time: 35 mins Serves: 3 cup Whole 30, 21 Day Sugar Detox, Paleo, Gluten Free, Vegan, Vegetarian, Dairy Free, Refined Sugar Free Ingredients 6 cups of dried coconut (any will work) Optional: 1-2 Tbsp coconut oil Instructions Add coconut shreds to a food processor. Process on high for up to 30 min. You will need to stop periodically to scrape the sides. Add optional coconut oil as needed but I suggest waiting to add it until after at least 15 min of processing. Note: I prefer using a food processor for this recipe but a high speed blender can be used as well. 3.2.2802
Read MoreZesty Coconut Lime Cups
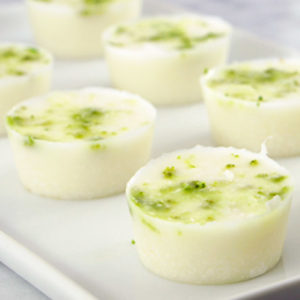
I can totally live without treats but they are certainly fun to make and to eat once in awhile. Completing one week on the 21-day sugar detox and having friends over called for just that. These treat cups are crazy easy to make and taste so delicious. The taste of lime takes me to a tropical island. For this recipe I used homemade coconut butter which I think made them even better! Enjoy! My recipe for coconut butter can be found here! Print Zesty Coconut Lime Cups Author: Katie at WHOLELOVELYLIFE.COM Recipe type: Snacks + Treats Prep time: 10 mins Total time: 10 mins Serves: 12 cups 21 Day Sugar Detox, Paleo, Vegan, Vegetarian, Refined Sugar Free, Autoimmune Protocol Ingredients ¼ cup coconut oil ¾ cup coconut butter 2 limes (zest from 1 and juice from both) 1 Tbsp dried coconut Instructions Melt coconut oil and coconut butter either in the microwave or on the stove top. Add lime juice and mix well. Transfer to silicone molds or cupcake pan lined with parchment paper or cupcake liners. Sprinkle with lime zest and dried coconut. Place in the freezer or fridge until hard. I like to store these in my freezer for a quick and easy treat. 3.2.2802
Read MoreAlmond Milk
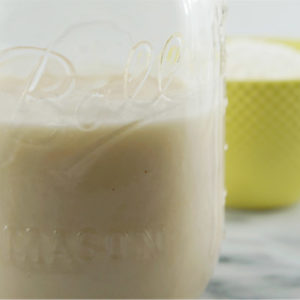
Freshly made almond milk is a staple in my house. My entire family loves it including my kiddo. It’s beyond easy to make and tastes so much better than store bought. I’m also excited to share that after some experimenting I have found a way to make double the milk using the same amount of almonds. It’s a huge money saver, which I’m happy to share because $14.99 a pound for organic almonds is not cheap and its so important to buy organic due to the pesticides used on conventional almonds. This method can be used for any nut milk! It even works for coconut milk! Homemade nut milks are so much better than store bought because they are not filled with any extra yucky ingredients like carrageenan. Carrageenan comes from seaweed and is added to dairy or dairy alternatives to improve the texture. This ingredient is also found in some organic items. You can be the judge here but there is a lot of information circulating about the potential dangers of consuming carrageenan and I personal don’t want to risk it for myself or family. It’s so easy to make your own there is really no reason to buy a nut milk with this potential dangerous ingredient. To make nut milks you can use a tea town or cheesecloth but I highly recommend a nut bag. They are a small investment and make the job so much easier. This is the Nut Milk Bag I have and recommend Print Almond Milk Author: Katie at Wholelovelylife.com Recipe type: Smoothie + Drinks + Juices Prep time: 10 mins Total time: 10 mins Serves: 8 cups Paleo, Vegan, Refined Sugar Free, Dairy Free, Vegetarian, Whole 30 (omit sweetener), 21 Day Sugar Detox (omit sweetener), Pescatarian, Grain Free, Gluten Free Ingredients 1 Cup Organic Almonds 8 Cups Filtered Water ¼ Tsp Celtic Salt/ Sea Salt Sweetener and Flavor Options 3 Dried Dates or Figs 1 Vanilla Bean or 1 Tsp Vanilla Extract 1 Tbsp Organic Grade B Maple Syrup or Organic Honey Instructions Add almonds to a jar or bowl and fully cover with water. Add salt and soak for at least 8 and as long a 24 hours. You can place them in the fridge or leave them on your counter. I find they plump up better outside the fridge but don’t soak any longer than 24 hours outside the fridge. Rinse soaked almonds and…
Read MoreCashew Milk
Oh how I love cashew milk! I have been meaning to get this post up for awhile but every time I whipped up a batch it was gone before I could photograph it. I love almond milk but cashew milk is a nice change once in awhile and it’s so creamy which makes it amazing in coffee! I will say its not as budget friendly as almond milk but there are lots of things you can do with the pulp to help eliminate waste money. Two of my favorite things to do with the pulp are make cashew cheese spread or dehydrate it, throw in a food processor and make cashew flour. Cashew flour is great to keep on hand and can be used like any other nut flour! For this recipe I use my same budget friendly approach where I blend the pulp to get a few additional cups. With almond milk I can get away with an additional 4 cups but with cashew milk the pulp is quite a bit finer so you can only get away with about 1-2 extra cups. Its also important with any nut milk to be sure and use organic. Whole Foods sells raw organic cashews which are great. Enjoy! Print Cashew Milk Author: Katie at WHOLELOVELYLIFE.COM Recipe type: Drink Prep time: 10 mins Total time: 10 mins Serves: 4-6 cups Paleo, Whole 30, Vegan, Vegetarian, Dairy Free, Gluten Free, Grain Free, Refined Sugar Free Ingredients 1 cup raw cashews 4-6 cups filtered water Optional: 1 vanilla bean, 1 tsp vanilla extract, 3 soaked dates, 5 drips liquid stevia Instructions Soak cashews in filtered water for at least 8 hours. Overnight is best. Rinse soaked cashews in filtered water and transfer to a blender. Add 4 cups filtered water and blend on high for 2-3 minutes. The longer you blend the creamier your milk will be. Strain milk into a large bowl using a nut milk bag or cheese cloth. Put pulp back in blender and add 1-2 cups of filtered water depending on how much pulp you have. Blend again for 1-2 min and strain milk into bowl using the nut milk bag or cheese cloth. If you are not going to put any of the optional ingredients in your milk then you are finished. If you are then go to the next step. Rinse blender and add vanilla and sweetener of choice. If…
Read MoreRed Thai Curry Veggie Zoodle Bowl
Whole 30 is officially over and I have to say I really like it. I’m not sure why it took me so long to give it a try. I figured that since it was not much different than how I normally eat there was no point but I was pleasantly surprised to have lost about 10 lbs. I was not expecting to lose weight but I’m not that much closer to getting back to my pre-baby weight! I guess I was eating too many fruit and veggie smoothies for breakfast versus a higher protein lower carbo complete meal. This insight was my biggest Whole 30 gain! There are certainly smoothies in my future I just won’t eat them every single day like I used to. Now that I have completed Whole 30 what is there left to do? The 21 Day Sugar Detox that’s what! I started yesterday and so far so good. I’m excited to see how my body does with even less fruit because I do feel sugar, even sugar from fruit, affects my body and arthritis pain. I would love to hear about your experience with Whole 30 and The 21 Day Sugar Detox! For my first dinner on the plan I whipped up a simple Red Thai Curry Veggie Zoodle Bowl. I was planning to add back a small amount of nightshades during the plan mostly in the form of spices but I woke up this morning feeling a bit more discomfort than normal so scratched that idea! Does anyone out there with arthritis have any experience with successfully adding back nightshades? I can live without them but do miss them from time to time. This is a super easy curry dish made with store bought curry paste. You can literally whip it up in about 20 minutes. This recipe has peas but I made it without them to make it 21 Day Detox compliant. You can add additional veggies or protein to your liking. Enjoy! 4.0 from 1 reviews Print Red Thai Curry Veggie Zoodle Bowl Author: Katie at WHOLELOVELYLIFE.COM Recipe type: Entree Prep time: 15 mins Cook time: 30 mins Total time: 45 mins Serves: 2 Whole 30, 21 Day Sugar Detox, Gluten Free, Vegan, Vegetarian, Grain Free, Dairy Free Ingredients 1 zucchini 1 carrot ½ cup peas (leave out for 21 day sugar detox) 1 cup broccoli 1 can full fat coconut milk 3 Tbsp…
Read MoreRaw Peach Raspberry Layer Cake
Another year and a Birthday has come and gone, I can’t believe how fast the time has been going. They say once you have kids the years pass quickly and this couldn’t be more true. The last year and a half with my little guy feels like the fastest of my life. I have savored every minute and even though summer is coming to an end there are so many fall activities to look forward to. Eating pumpkin and pumpkin spice with everything, designing a Halloween costume, Thanksgiving dinner with family and then Christmas! I feel blessed to have had my twin sister with me again this year on our birthday and I wanted to make a cake we could both enjoy. I got rave reviews from everyone! Raw peach raspberry make for a delicious and refreshing combo. Enjoy! Print Raw Peach Raspberry Layered Cake Author: Katie at Wholelovelylife.com Recipe type: Snacks + Treats Prep time: 30 mins Total time: 30 mins Serves: 10-12 Paleo, Vegan, Gluten Free, Vegetarian, Dairy Free, Grain Free, Refined Sugar free Ingredients ½ cup raw pecans 3 + ⅓ cup raw cashews (3 cups need to be soaked for at least 8 hours) ⅓ cup raw almonds 3 Tbsp grade B maple syrup ½ cup + 3 Tbs coconut oil 2 tsp vanilla ⅛ tsp sea salt 2 fresh peaches or 2 cups frozen ¾ cup frozen raspberries ½ cup filtered water 3 tsp fresh squeezed lemon juice 1 can full fat coconut milk cream separated (refrigerate can overnight, upside down) ½ pint fresh raspberries + a few mint leaves for garnish Instructions Place two small pots on stove top. In one pan add chopped and peeled peaches with ¼ cup of filtered water. In the second pan add raspberries with ¼ cup of filtered water. Cook fruit for 12 min on medium heat until soft. While fruit is cooking make the crust. To make the crust mix in a food processor, pecans, ⅓ cup cashews, almonds, 3 Tbsp coconut oil, 1 tsp vanilla, sea salt and 3 Tbsp maple syrup. Once ingredients are sticking together remove from food processor and press into a 9″ or 12″ spring pan. You can line the bottom with parchment paper if you would prefer to remove the cake from the metal base. Put crust in the freezer to set. Wash the food processor and add 3 cups of soaked cashews.…
Read MoreGreen Onion Cashew Cheese Spread
I have been making a lot of cashew milk lately. I’m surprised I’m saying this but I actually think I like it more than almond milk! The cashew pulp has been piling up fast and I have yet to dehydrate it or try in other recipes. I think it would make a great breading for veggies or chicken since it’s so mild in flavor, very fine in texture and could be seasoned to your liking. I will be experimenting with that soon! If you don’t want to take the time to dehydrate your pulp and don’t want all that goodness to go to waste what are you to do? How about whip up a super easy batch of cashew cheese spread! Now, if you are addicted to cheese and can’t live without the real thing this one is probably not for you. But if you are an open minded Paleo, vegan or eat dairy free this one is perfect! It’s super easy to make this cheese and it will last in the fridge for about 2-3 days. Be sure to keep it stored in an airtight container. I used garlic and green onions for flavor but once you have the base you can season it however you like. If you don’t feel the need to eat it right away you can also wait for it to firm up in the fridge, shape into a ball and roll in your favorite nuts. Enjoy! Try this cashew cheese with Grain Free Coconut Sage Crackers. Print Green Onion Cashew Cheese Spread Author: Katie @ Wholelovelylife.com Recipe type: Condiments + Sauces Prep time: 10 mins Total time: 10 mins Serves: 4-6 Paleo, Vegan, Whole 30, 21 Day Sugar Detox, Gluten Free, Vegetarian, Pescatarian, Dairy Free Ingredients 2 Tbsp coconut cream 1 cup cashew pulp 1 tsp sea salt 2 garlic cloves ½ tsp pepper 1 Tbsp olive oil 1 tsp lemon juice 1 medium green onion Instructions The best way to get cashew pulp is to make cashew milk and save the pulp. One to two batches will create plenty of pulp for this recipe. The pulp only lasts a few days in the fridge so don’t store it for too long. Take the length of time the pulp has been stored into account when you store the prepared cheese. Refrigerate a can of coconut milk over night right side up. Flip upside down and open from the bottom.…
Read MoreGrain Free Sage Crackers
I’m not a huge cracker person but once in awhile you want something a little crunchy to snack on. These crackers are a super healthy and tasty snack that can be altered by using your favorite fresh or dried herbs. I love sage but have made these with rosemary before which is also delicious. I’m not going to lie, these are a bit time intensive but will last for a month or more in an airtight container so are worth the work. It’s also a fun recipe to try with your kiddos since these crackers can be cut into any shape using their favorite cookie cutters. Enjoy! Try them with Green Onion Cashew Cheese Spread. Print Grain Free Sage Crackers Author: Katie at Wholelovelylife.com Recipe type: Treats + Snacks Prep time: 30 mins Cook time: 30 mins Total time: 1 hour Serves: 6-8 Paleo, Vegetarian, Grain Free, Gluten Free, Dairy Free, Whole 30, 21 Day Sugar Detox Ingredients 3 Tbsp olive oil 1 garlic clove chopped 1 cup coconut flour ½ cup almond flour 1 tsp sea salt 3 eggs 1 Tbsp filtered water 2 Tbsp chopped fresh sage or herb of choice arrowroot flour for dusting Instructions Add all ingredients except sage to a food processor and mix well until a dough forms. Add sage to dough and lightly mix. Dust hands with arrowroot flour and remove dough from food processor. Lay dough on a sheet of parchment paper and carefully role out until about ⅛” thick. Cut into squares with a knife or use a square shaped cookie cutter. I prefer using a cookie cutter to ensure I achieve a perfect square. You can also use fun cookie cutter shapes to get your kids involved. Bake on parchment paper at 350 for around 25 min or until golden brown flipping every 5 to 10 minutes. 3.2.1311
Read MoreDijon Balsamic Sauce
This super simple Dijon Balsamic sauce and can literally be thrown together in just a few minutes from simple ingredients. I love it drizzled over veggies, as a salad dressing, dipping sauce or used as a marinade for meat. It does have a minimal amount of honey so if you are following Whole 30 or the 21 Day Sugar detox I suggest leaving it out. It is great with or without it. I have tried multiple brands of Dijon to try and find one similar to Grey Poupon and this is it. I highly recommend Annie’s. You will love it! I’m also a fan of this balsamic from Trader Joe’s. It’s free of caramel color, which you need to be really cautious of when buying balsamic vinegar. Trader Joe’s larger, cheaper bottles have it so be careful! Enjoy! Print Dijon Balsamic Sauce Author: Katie at WHOLE LOVELY LIFE Recipe type: Condiments + Sauces Prep time: 5 mins Total time: 5 mins Serves: 4 Paleo, Autoimmune Protocol, Vegan, Vegetarian, Pescatarian, Whole 30 and 21 Day Sugar Detox (omit honey), Gluten Free Ingredients 2 Tbsp Dijon mustard (I like Annie’s) 1 Tbsp balsamic vinegar 1 tsp clover honey Instructions In a small bowl mix all ingredients together. Drizzle on veggies or use as a dip. This sauce is also great on chicken and other meats. Notes Use organic whenever possible! 3.2.2929
Read MoreGrilled Green Beans With Dijon Balsamic Drizzle + Toasted Pecans
Wow this recipe sure has a long name! I thought it was important to put all the ingredients in the name because they all play an important part in creating one tasty side dish. If you have not grilled fresh green beans before its a must! They are just amazing. This recipe turned out so good my hubby, babe and I finished off the entire thing for dinner. This makes a great solo dish but would be amazing served aside a veggie or meat dish. I think these green beans will be making onto my 2014 Thanksgiving menu. No reason to wait till Thanksgiving to make these when you can eat them now! Enjoy! You can find the recipe for the Dijon Balsamic Sauce here. Print Grilled Green Beans With Dijon Balsamic Drizzle + Toasted Pecans Author: Katie at WHOLELOVELYLIFE.COM Recipe type: Sides + Salads Prep time: 5 mins Cook time: 15 mins Total time: 20 mins Serves: 4 Paleo, Autoimmune Protocol (omit pecans), Vegan, Vegetarian, Pescatarian, Whole 30 and 21 Day Sugar Detox (omit honey), Gluten Free Ingredients 1 lb green beans 1 Tbsp olive oil ¼ tsp sea salt ¼ tsp pepper 1 Tbsp chopped and toasted pecans Instructions Wash and trim ends of green beans. Toss green beans in olive oil and place in a grill basket. Sprinkle with salt and pepper. Grill for 15 min or until starting to brown. Toast pecans in the over for 3-5 min at 350. Transfer to a bowl and drizzle with Dijon Balsamic Sauce. Sprinkle with pecans. Notes Use organic whenever possible! Omit pecans to make Autoimmune Protocol compliant. 3.2.2929
Read More