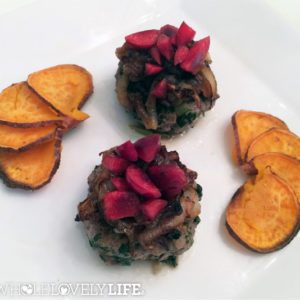
I love to make a simple hash on the weekend. The great thing about a hash is you can seriously take whatever is lying around or on its way out in the fridge and throw it together! This is a really simple hash consisting of only sweet potato and red onion. So simple yet so good. I love to garnish my hashes with fresh fruit. Enjoy! Print Sweet Potato + Red Onion Hash Author: Katie at Wholelovelylife.com Recipe type: Breakfast + Brunch Prep time: 10 mins Cook time: 20 mins Total time: 30 mins Serves: 2 Ingredients 2 medium sweet potatoes 1 large red onion ½ tsp sea salt 1 Tbsp avocado, olive, coconut oil or ghee Instructions Cut sweet potato and onion into small cubes. You can also grate the sweet potato in your food processor. Add cut sweet potato and onion to a pan with oil of choice and saute 15-20 min or until browned. Notes I like to cut or grate extra sweet potato and keep in the fridge for a quick side dish throughout the week. 3.2.1311
Read MoreZoodles with Avocado Pesto
Zoodles are gaining in popularity and I can see why. They are amazingly easy to make, full of healthy nutrients because they are made from veggies and so much prettier than a beige colored noodle. To make zoodles you can use zucchini, squash, sweet potato, cucumbers or practically any veggie you choose. Zucchini noodles are pretty standard for pasta dishes. There are different methods that you can use to create noodles. You can use a normal peeler to achieve a wider flat noodle kind of like linguini, a julienne slicer to create skinnier angle hair pasta or a spiralizer to create a thick more spaghetti like noodle. I have not jumped on the spiralizer band wagon just yet but it’s on my list of things to buy. It looks way more fun than a julienne slicer. Whatever method you decide on to cut your zoodles the one thing I can guarantee is they will be super tasty! This zoodle dish has a simple sauce combining two of my favorite things. Avocado and basil! You seriously cannot go wrong! Enjoy! Print Zoodles with Avocado Pesto Author: Katie @ Wholelovelylife.com Recipe type: Entree Ingredients 3 medium zucchinis 1 ripe avocado 1-2 cloves of garlic depending on size ¼ cup basil ¼ tsp sea salt 1 Tbps lemon juice 1 tsp olive oil for sauteing zoodles 1 Tbsp olive oil for avocado pesto sauce Instructions Make zoodles per prefered method. Lay on paper towel and let sit for 10 min to allow water to be absorbed. Sautee in pan with 1 tsp olive oil for 5 min. Set aside. For sauce combine avocado, garlic, basil, sea salt, lemon and olive oil in a food processor or blender until smooth. Mix zoodles with sauce and garnish with basil leaves and red pepper flakes. Notes If following AIP omit the red pepper flakes. I know super sad. 3.2.1311
Read MoreEnglish Cucumber + Red Onion Salad with Champange Vinaigrette
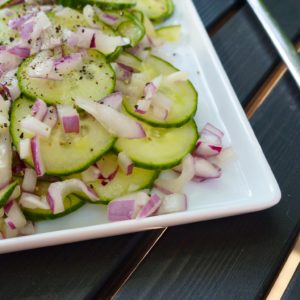
One thing I love about summer is eating outside and nothing screams outside more than a cucumber salad that not only tastes amazing but is easy to make too. This one is so simple it screams to be made right now! Cucumber salad reminds me of childhood and is a staple in my house especially during warmer months. Isn’t it great the good memories food can bring back? I love using champagne vinegar! This salad is also a great side to take to a party and sounds super duper fancy. Who doesn’t love a good cucumber salad with champs vinegar? I know I do! And yes I said champs! Did you know cucumbers have amazing health benefits? They are full of B vitamins and 95% water which not only makes them good for your body but your skin too! They are also amazing for joint health and arthritis. They contain silica, vitamins A, C and D as well as foliate, calcium, magnesium and potassium. Print English Cucumber + Red Onion Salad with Champange Vinaigrette Author: Katie at Wholelovelylife.com Recipe type: Salad Prep time: 5 mins Cook time: 1 hour Total time: 1 hour 5 mins Serves: 4 Ingredients 1 english cucumber 1 small red onion ¼ cup champagne vinegar ¼ cup olive oil ½ tsp sea salt ½ tsp pepper Instructions Slice cucumber using a knife or mandolin slicer. You can also chop into cubes if you prefer. Chop red onion. Place cucumber and onion in a bowl and add champagne vinegar, olive oil, salt and pepper. Stir well and let sit for an hour before serving. Notes Can serve immediately but waiting an hour will fully bring out all flavors. This salad is even better the next day! 3.2.1311
Read MoreBeet + Carrot Ketchup
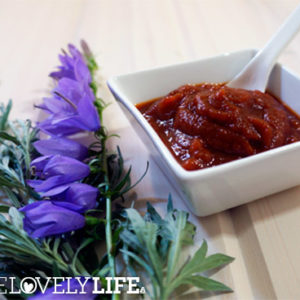
Being Paleo is not all that hard but following autoimmune protocol can have its challenges at times. I love veggie fries but miss having some plain old ketchup to dip them in. I’m super excited to share this recipe with all of you because if you are missing ketchup like I have been missing it you will finally be able to enjoy your veggie fries like you used to. This recipe is perfect for anyone following AIP or who do not consume tomatoes or nightshades. I have tried a few tomato free ketchups but have not found one that I like. After some trial and error I think this one hits the mark. It has the perfect balance of tang and sweetness. I think the secret to bringing the flavors together is cooking it which a lot of other tomato free ketchups lack. The cooking process also thickens it and helps it to stick to what you are eating. This recipe makes enough for at least 2 people. If I know I will be making veggie fries a few nights in a row I make a double batch. This ketchup is also great on grass fed burgers and hot dogs too! Enjoy! Print Beet and Carrot Ketchup Prep time: 10 mins Cook time: 20 mins Total time: 30 mins Serves: 2 Ingredients 1 cup of well cooked carrots ¼ cup well cooked beets ¼ cup filtered water 2 Tbps lemon juice 1 tsp champagne vinegar 3 Tbps honey 1 tsp garlic powder 1 tsp onion powder ¼ tsp oregano ½ tsp sea salt or more to taste Instructions Peel and cut into chunks carrots and beets if using fresh and boil in water until very well cooked and mushy. I love using already cooked beets and baby carrots to save on prep time. Add cooked carrots, beets and the remaining ingredients to a blender and blend on high until fully mixed and smooth. Pour ketchup in a small pot and cook over medium heat for 20 min or until ketchup thickens. Make sure you see some bubbles rising to the top as it cooks. Cool and serve. Keeps in the fridge for about 3 days. 3.2.1311
Read MoreJicama Quiche Crust
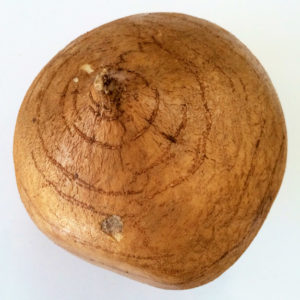
Did you know that you can use jicama the same way use white potatoes? This is great news for anyone missing white potatoes in their diet. It makes a great quiche crust, fries and hash browns. You name it. Just treat it like a plain old potato. I am currently working on a jicama pizza crust, which I’m excited to share in the near future. Enjoy! Print Jicama Quiche Crust Author: Katie at Wholelovelylife.com Cuisine: Breakfast/Brunch Prep time: 5 mins Cook time: 20 mins Total time: 25 mins Serves: 6-8 Ingredients 1 medium or 2 small jicama 2 Tbsp olive, coconut or avocado oil Instructions Remove jicama skin either with a peeler or by cutting with a knife. I prefer to chop in 4 pieces and then cut the skin off. Grate jicama either with a food processor or by hand. Place in bowl and squeeze excess water out by pressing with paper towels. Remove as much water as possible. Add olive oil and mix well. Press into baking dish or iron skillet. Press one additional time with a paper towel if needed. Bake at 425 for 15-20 min or until crust begins to brown around outside. 3.2.1311
Read MoreLeek, Mushroom + Basil Quiche with Jicama Crust
I’m super excited to share this recipe with you! Quiche is one of my favorite things to make for brunch or at the beginning of the week for easy breakfasts. What makes this quiche so great is the jicama crust! Did you know jicama is a great sub for white potatoes? I absolutely love eating it cold in salads but when cooked it takes on a similar taste and consistency as white potatoes. I think it’s a great addition to change things up a bit especially if you are Paleo or following autoimmune protocol and need a change from sweet potatoes. Jicama is high in phyto-nutrients, fiber, vitamin C as well as some B vitamins such as thiamin, foliate and riboflavin. They also contain magnesium, copper and iron. They are amazing sliced up and eaten as a chip alternative with guacamole and salsa or chopped in a salad. They pair well with other veggies as well as fruit and they are also great cooked! Next time you are at the store pick up a few and get creative! Enjoy! Here is the recipe for my jicama quiche crust. Print Leek, Mushroom + Basil Quiche with Jicama Crust Author: Katie at Wholelovelylife.com Recipe type: Brunch Prep time: 15 mins Cook time: 35 mins Total time: 50 mins Serves: 6-8 Ingredients 1 small leek sliced 1 small container of mushrooms sliced ½ container of basil chopped 8-10 eggs depending on pan size 2 Tbsp melted ghee ⅓ cup full fat coconut milk 2 tsp olive oil for cooking leeks and mushrooms 1 tsp celtic or sea salt 1 tsp cracked pepper Instructions Slice leek and mushroom. Slice basil. In a pan add 1tsp olive oil and saute leeks for 10 min or until slightly brown. In the same pan add 1tsp more of olive oil if needed and saute mushrooms until all water is released about 5 min. To save time you can cook the leeks and mushrooms at the same time in different pans. Crack 8-10 eggs into a bowl or your blender. I like to use a blender because I feel like the eggs get extra fluffy this way. Melt ghee. Add melted ghee, coconut milk, salt and pepper to eggs and blend for 15 seconds or until well mixed. Add cooked leeks and mushrooms to eggs along with basil. I keep a small amount of extra leeks, mushrooms and basil to…
Read MoreArugula Salad with Tiny Lemon Garlic Shrimp
Salads are one of my favorite things to make and eat. I love how fast and easy it is to throw one together when you are in a rush or to take one with you on the go. It’s fun to get creative and make your very own masterpiece. The more color you can add the better. For a complete meal be sure to add veggies, fruit, a good fat and a protein. This is a great starter salad or makes the perfect entree. Arugula also known as rocket is one of my favorite greens! It’s great mixed with other greens or on it’s own with a simple oil and vinegar dressing. Arugula is super high in vitamin C and a great source of copper and iron. It’s filled with phyto-chemicals that help fight carcinogens in the body and is also an amazing anti-inflammatory! If you are looking for tiny shrimp I found mine at Costco. Be sure to look for wild caught whenever you purchase fish. Enjoy! Print Arugula Lemon Garlic Shrimp Salad Author: Katie at Wholelovelylife.com Recipe type: Salad Prep time: 10 mins Cook time: 5 mins Total time: 15 mins Serves: 1 Ingredients Salad 3 cups arugula ½ cup tiny shrimp or 5 medium size shrimp ¼ cup fresh squeezed lemon juice 1 clove of garlic 1 tsp ghee ¼ avocado 1 strawberry Dressing 2 Tbsp fresh squeezed lemon juice 1 Tbsp avocado or olive oil Dash of celtic / sea salt Dash of fresh ground pepper Instructions Salad Chop garlic clove and add to pan along with ghee. Cook for about 1 min and then add the shrimp. Saute 2-3 min and add the lemon. Continue to cook for an additional 1 or until shrimp are slightly browned. Place shirmp in a bowl to cool down while you prep the salad. Make dressing by mixing the lemon juice, oil, salt and pepper. Cut the strawberry and avocado. To assemble salad top arugula with shrimp, avocado, strawberry and drizzle with the dressing. Notes Make sure your shirmp are wild. Costco has a good selection of affordable wild caught shirmp! 3.2.1311
Read More