It sure has been a rough last 3 weeks. If you follow my Instagram then you know I have been battling the worst iritis flare I have ever had. My history with iritis has not been as long as my one with ankylosing spondylitis. I had my first episode 3.5 years ago. I experienced a flare last September, almost to the exact day I had it 3 years previously. I was on Pred Forte drops for over two months and things improved very quickly. Then, at the end of February this year I had another flare. I caught it right away and again the eye drops worked wonders. Almost 3 weeks ago I started noticing some symptoms creeping back. I went to my eye doctor right away and at first he thought things looked fine but by the next day I had a complete re-flare. Just as I thought my weeks of drops were coming to an end I had to start from the beginning again. Major bummer! I’m leaving in 2 weeks for an overseas work trip and was really hoping to be back in contacts, able to wear some mascara and my favorite sunglasses. When he told me it was back I felt total defeat. I tried to hold back my tears walking back to work but they got the best of me and when I got back to my desk the waterworks were uncontrollable. It’s been a very long time since I have cried about my autoimmune disease. When you battle an autoimmune disease or in my case more than one, when things are going good you feel like you are on vacation. You can enjoy each and everyday from both a physical and mental standpoint. However, when you are going through a flare it can be so hard to keep your head up and to keep fighting. I am a positive person but we all have our breaking points. I experienced mine this past week. The pain with this case of iritis was almost unbearable. Something I have not experienced with my other cases. I had pain that was radiating into my face above and below my eye. Looking at the computer all day or anything for that matter was draining. I also experienced blurry vision this time around which even though is considered normal still freaked me out. Today I saw my eye doctor again and things were still looking inflamed so he put me on a 10-day course of oral Prednisone. I hate taking prescription drugs but I know it’s the right thing for me to do right now. I’m happy to share that after only starting them around 1pm this afternoon the lingering pain I was having has vanished! I can’t even tell you how thankful I am. Over the last 3 weeks I have been back to following strict autoimmune protocol. Even though I feel I have been able to reintroduce eggs, nuts and seeds in the past I am off of them again. I have also been taking turmeric and ginger shots both morning and night along with bilberry extract. All three can help with chronic iritis as well as other inflammatory conditions. Sometimes, even when you are doing everything right from a diet standpoint your body just does not care. I’m hoping this will be the one and only time I need to go on oral Prednisone but I am certainly glad I had options. Iritis can become a very serious condition quickly if it does not get under control. I’m sorry for a bit of a downer post but the reality is this is my reality right now and I would rather share with all you than to keep it all inside. We all know that’s not good! On a happy note I treated myself to a pair of prescription Ray Ban Wayfarer Lightforce sunglasses. It’s Ray Ban’s newest wayfarer style and they are seriously cute! I will have sunglasses for my trip after all! The little things right. Anyone else dealing with chronic iritis? What has worked for you?
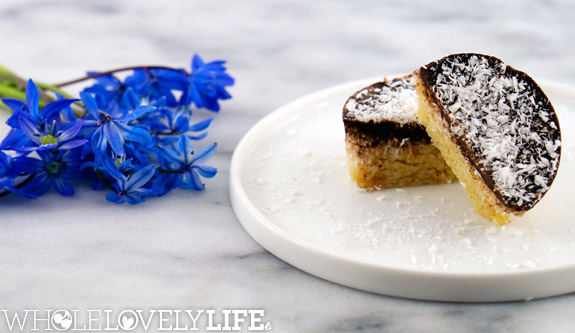
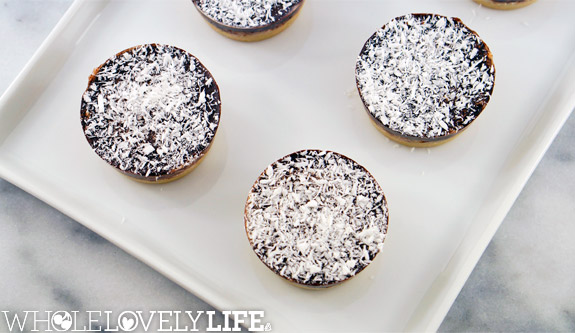
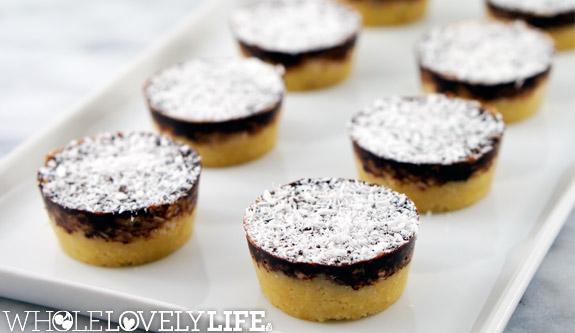
Ok, now onto the fun stuff. I thought it was time to share a new treat recipe. It’s been awhile since I have and this might be one of the simplest treats to throw together. Don’t let the long directions scare you. This recipe uses minimal ingredients and all you need to do is mix, layer and chill. The other great thing about these Coconut Chocolate Cups is they can be made Autoimmune Protocol compliant by using coconut flour instead of almond flour and using carob powder instead of raw cacao powder! Carob does not taste exactly like raw cacao but I think it’s a great substitute that will keep you on track when you need a little treat. Enjoy!
I used this silicone pan.
- Crust
- ⅛ tsp sea salt
- 2 cup blanched almond flour or coconut flour to make autoimmune protocol compliant
- 2 Tbsp melted coconut oil
- 1 Tbsp grade B maple syrup
- Coconut Layer
- 2 Tbsp melted coconut oil
- 4 Tbsp grade B maple syrup
- 2 cup finely dry shredded coconut
- Chocolate Layer
- ⅓ cup raw cacao powder or carob powder to make autoimmune protocol compliant
- ⅓ cup melted coconut oil
- 2 Tbsp grade B maple syrup
- Optional: sprinkling of coconut on top
- To make crust combine sea salt, blanched almond flour or coconut flour, 2 Tbsp melted coconut oil and 1 Tbsp grade B maple syrup. Mix well. If ingredients seem dry you can add a bit more melted coconut oil.
- Evenly distribute crust into all sections in either a lined muffin pan or silicone mold. Press crust down until well packed. This recipe will make 11 small sized cups or six larger cups. Tip: scoop the crust into all sections before pressing down. This ensures you can adjust the amount in each section if needed. Pop into the fridge while you make the coconut layer.
- In the same bowl combine 2 Tbsp melted coconut oil, 4 Tbsp grade B maple syrup and 2 cups shredded coconut. Mix well. If ingredients seem dry you can add a bit more melted coconut oil.
- Evenly distribute the coconut layer following the same method as step 2.
- To make the chocolate layer combine ⅓ cup of melted coconut oil with ⅓ cup of raw cacao or carob powder and 2 Tbsp grade B maple syrup. Make sure your coconut oil and maple syrup are not to hot but are warm enough to easily mix in the the cacao or carob powder. Carob can be a bit temperamental. Do not reheat it if it seems a bit grainy instead of smooth. This will actually make it worse. In my experience you just need to mix and pour quickly. The more it cools the grainier it will become. Even if it does not look super pretty I promise it will still taste good!
- Spoon or pour chocolate layer over the top. I prefer using a spoon because you are better able to control the amount. The chocolate layer should be thinner then the others.
- Refrigerate for 4 hours or overnight. If you really can't wait you can pop these into the freezer for about an hour.
- If you choose to garnish with a sprinkling of coconut you need to let the chocolate set for a bit otherwise the coconut will sink to the bottom. Once the chocolate thickens up a bit you should be good to go and can sprinkle away! If using carob this will happen sooner.


